
Ultimate Guide On How to Create the Facebook Pixel’s Access Token

Facebook Pixel Access Token is a great tool that has the potential to revolutionize the way you approach online ads. This article equips you with the knowledge to navigate the complexities and seamlessly integrate the Facebook Pixel Access Token into your digital marketing arsenal.
Our guide will provide details on how to create Facebook Pixel’s Access Token and generate respective Access Token to help set up Conversions API on Facebook. This will empower you to supercharge your campaigns, optimize audience targeting, and elevate your online presence. Our guide will cover:
- A. Create a Facebook Pixel
- B. Generate an Access Token for Facebook Pixel
Let’s dive right in
A. Create a Facebook Pixel
To create a Facebook Pixel, you need access to Facebook Business Manager for your online store.
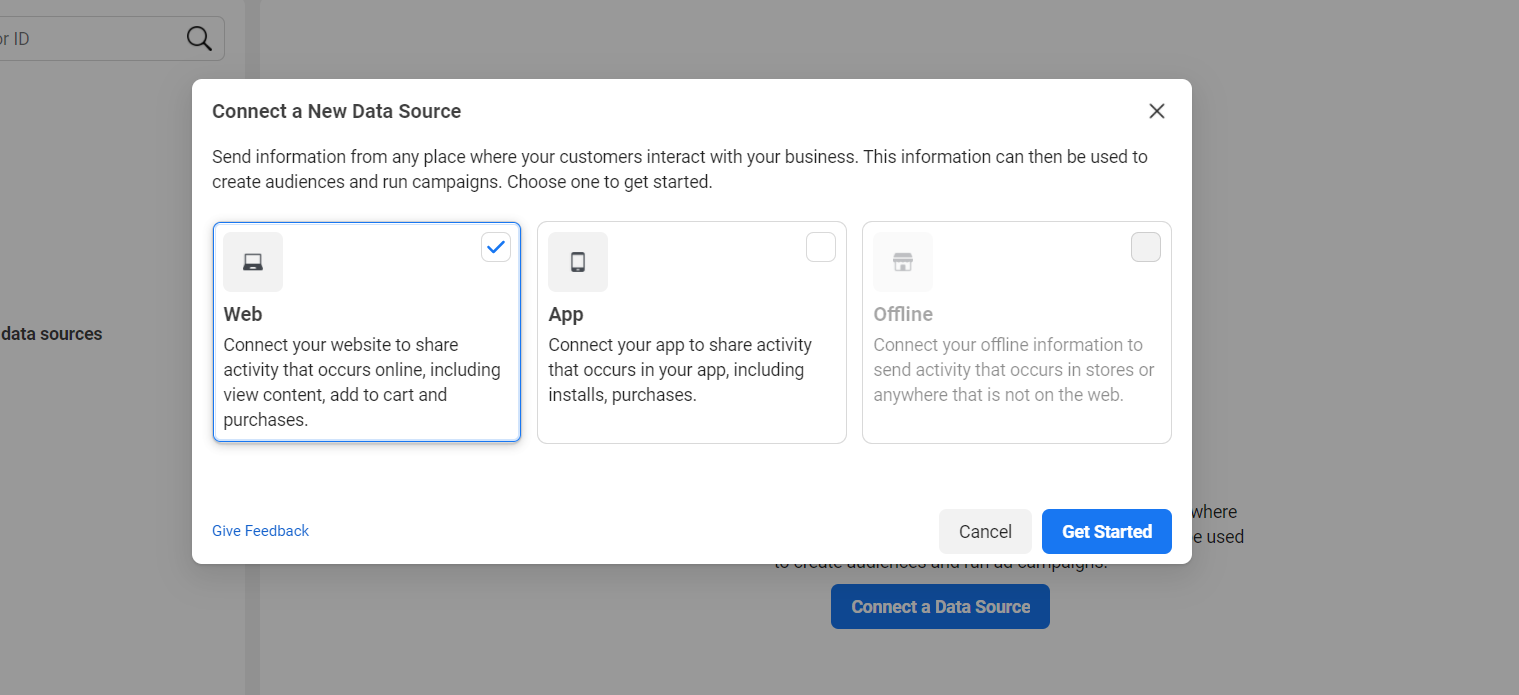
First, let’s log in to Events Manager. Next, click Connect Data Sources.

After that, select Web and click Get Started.
Next step, select Facebook Pixel and click Connect.

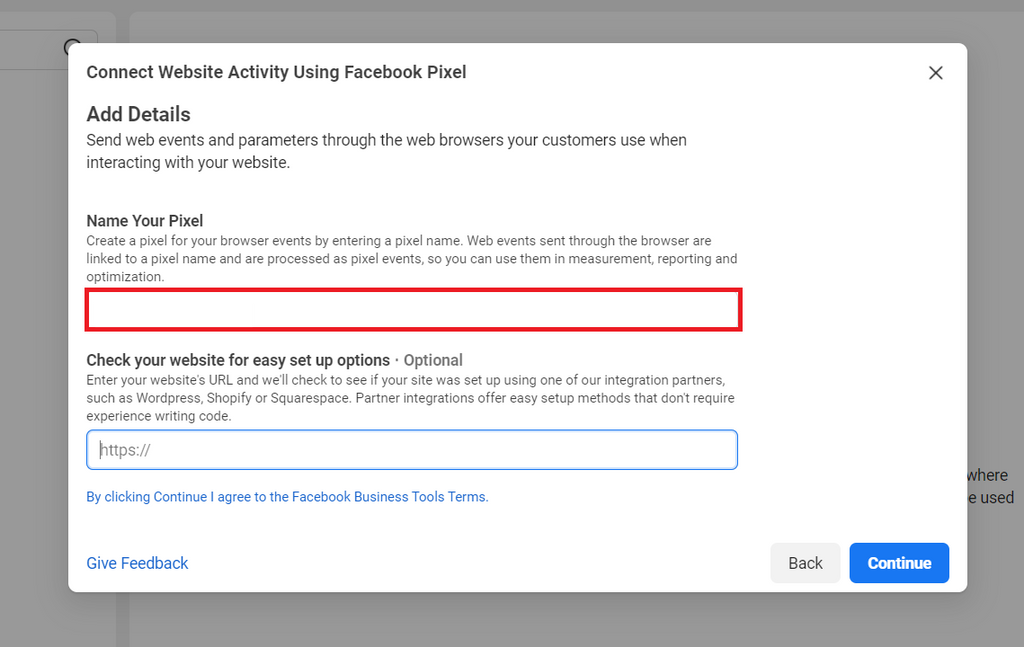
Next, enter your new pixel’s name in Name Your Pixel. After that, enter your website URL and click Continue:
After creating a Facebook Pixel, you will get a Pixel ID. This Pixel ID can then be attached to your ShopBase online store, giving you detailed insights on conversions, audience profile and their behaviors on your website.

B. Generate an Access Token for Facebook Pixel
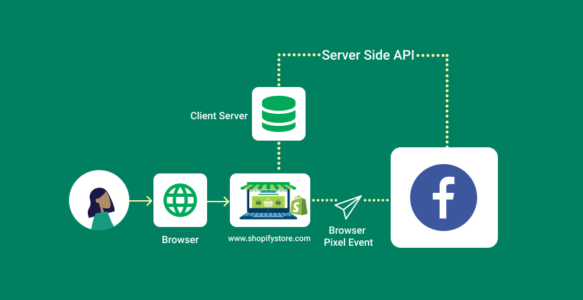
The Conversions API collaborates seamlessly with the Facebook Pixel, enhancing the effectiveness of your Facebook ads through the direct transmission of events from the server to Facebook’s platform. These server events are associated with a designated Facebook Pixel. Creating an Access Token for the pre-existing Pixel is essential to establish this connection.
You need admin access to Facebook Business Manager to generate an access token. Let’s follow the following steps:
First, log in to Events Manager. Next step, choose a specific Pixel to set up Conversions API.

Next, choose Settings:

Click Generate Access Token under the Conversions API section.

After that, copy the generated Access token. It’s important to securely store this access token, as Facebook does not retain a copy of it:

Final words
Access Token serves as your gateway to seamless integration, enabling your business to bridge the gap between your Facebook Pixel and external platforms. Hoping our comprehensive guide on how to create the Facebook Pixel’s Access Token is beneficial for your business in leveraging Facebook Pixel and maximizing the potential of your online campaigns. Contact us if you have any further questions!
Email: orichi247@gmail.com
Facebook Pixel App (The best solution for IOS 14 update): https://apps.shopify.com/yuri-facebook-multi-pixels
Website: https://orichi.info
5,718 total views, 1 views today