Adding products to your Shopify store should be efficient and stress-free. Yet, if you’ve ever uploaded dozens—or even hundreds—of products manually, you know how tedious it can get. Entering every title, description, image, and price one by one wastes valuable time and increases the chance of human error.
That’s where the Shopify CSV import feature becomes a game changer. With a single CSV file, you can bulk upload or update your entire product catalog in minutes. No more endless manual edits—just prepare your spreadsheet, click import, and let Shopify handle the rest.
For growing eCommerce brands, especially those using Orichi apps to optimize store management, the Shopify CSV import tool is not just a shortcut—it’s a business essential.
In this Shopify tutorial, you’ll learn everything you need to know about CSV imports in 2025: how the process works, how to prepare a clean and valid file, common CSV errors to avoid, and best practices for maintaining accurate product data. Whether you’re migrating from another platform, launching a new collection, or updating bulk inventory, this step-by-step guide will help you save time and streamline your Shopify operations.
What Is Shopify CSV Import and Why It Matters for Store Owners
A CSV import is Shopify’s way of letting you bulk-manage products using a simple spreadsheet file. CSV stands for “comma-separated values,” which is just a technical way of saying a text file where data is organized into columns.
For Shopify store owners, that spreadsheet can hold everything about a product: its name, description, price, images, inventory, and even variations like size or color. Once the file is uploaded, Shopify reads the data and creates or updates products automatically.
Why does this matter? Imagine managing 20 products versus 2,000. Entering each one by hand isn’t just impractical—it’s impossible to scale. CSV import allows you to:
- Add hundreds of products at once
- Update pricing or inventory in bulk
- Migrate product data from another e-commerce platform
- Keep your catalog consistent and error-free
Think of it as turning hours of data entry into a single, well-prepared upload. The result: more time to focus on sales, marketing, and actually running your business.
Preparing Your CSV File the Right Way
Before you hit that import button, the real work happens in your CSV file. Think of it as the blueprint for your products: if the structure isn’t solid, your import will collapse with errors. The good news? Shopify gives you a ready-to-use template, and once you understand the key fields, filling it out becomes second nature.
Start With Shopify’s Template
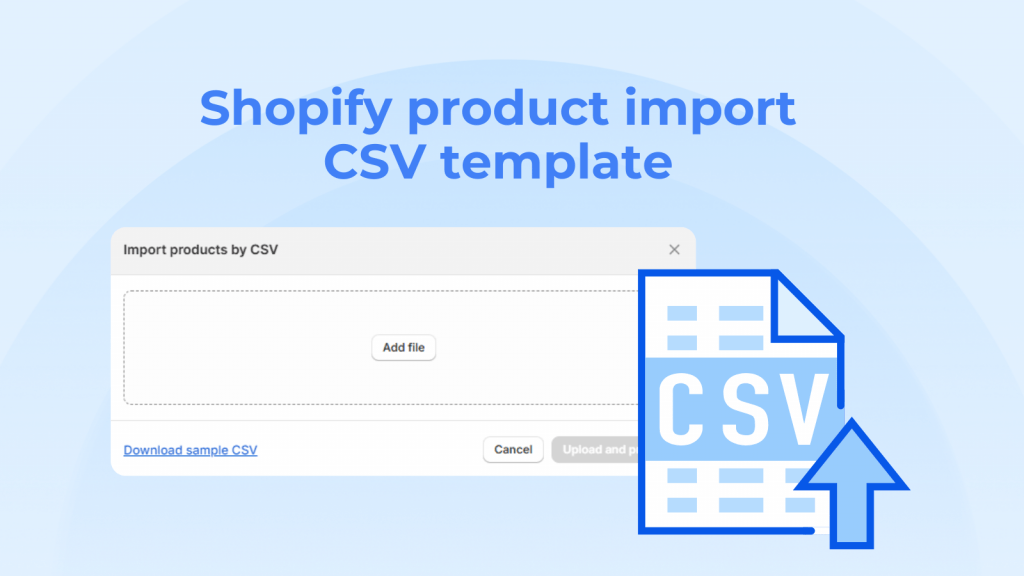
Shopify provides a sample CSV file that shows exactly how the data should be organized. Download it first—this ensures you’re working with the right column names and order. Even a small typo in a header can throw the whole import off.
Key Fields You Need to Know
Your CSV might look overwhelming at first, but not every field is essential. Here are the ones most store owners use daily:
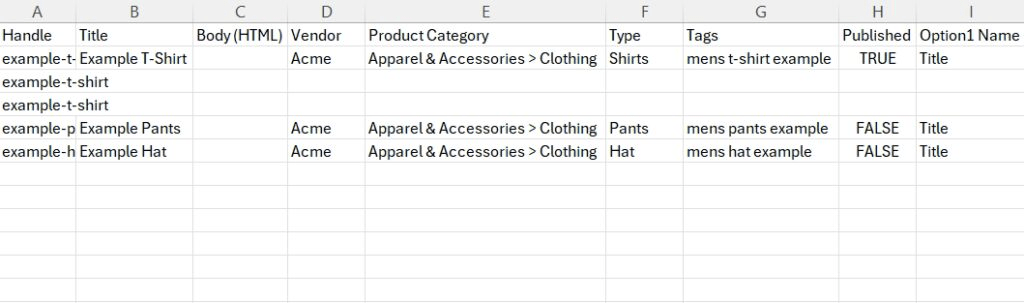
- Handle – The unique name for each product (used in URLs). Think of it as the product’s ID.
- Title – The product name that shows on your storefront.
- Body (HTML) – The description, which can include text formatting and links.
- Vendor – The brand or manufacturer.
- Type – The category or product type.
- Tags – Keywords to help with organization and filtering.
- Price – The selling price.
- Compare at Price – Useful for showing discounts.
- Inventory Quantity – How many units are available.
- Variant Options – Size, color, or other variations.
- Image Src – The URL of the product image.
Keep Your Data Clean
A messy CSV leads to messy imports. To avoid headaches:
- Stick to consistent formatting (e.g., always use lowercase for handles).
- Double-check spelling and numbers—typos in prices or inventory can be costly.
- If you’re adding variants, make sure each option matches up with the correct parent product.
- Test with a small batch of products before uploading your full catalog.
When done right, your CSV becomes more than just a file—it’s a master record of your store. Clean, accurate data makes every future update smoother and faster.
Step-by-Step: How to Import Products with a CSV in Shopify
Once your CSV file is ready, it’s time to bring those products into your Shopify store. The process is straightforward, but taking it step by step helps you avoid surprises.
1. Download Shopify’s Sample CSV
If you haven’t already, grab Shopify’s official sample CSV file. This ensures your headers are correct and your data will line up perfectly when imported.
2. Fill In Your Product Details
Open the CSV in a spreadsheet program like Google Sheets or Excel. Enter your product information into the relevant columns: titles, descriptions, prices, inventory, images, and so on. Keep it clean and consistent.
3. Save the File in the Correct Format
When finished, save or export the sheet as a CSV (UTF-8) file. This encoding is important—without it, special characters (like symbols or accented letters) can break during import.
4. Go to Shopify Admin → Products → Import
Log in to your Shopify Admin panel, click Products, then select Import. This is where you’ll upload your file.
5. Upload and Confirm
Choose your CSV file, then decide if you want to:
- Add new products
- Update existing products with the same handle (useful for editing prices, descriptions, or inventory in bulk)
Review the summary Shopify gives you before confirming.
6. Review Your Imported Products
After the upload, Shopify will display a confirmation screen. Take a few minutes to check your store:
- Are product images displaying correctly?
- Do titles, prices, and descriptions look clean?
- Are variants grouped under the right product?
If something looks off, don’t panic. You can re-edit the CSV and import again, or revert changes if needed.
Updating Products with Shopify CSV Import
Shopify’s CSV import isn’t just for adding new products. It’s also a powerful way to update the ones you already have. Maybe you want to adjust prices across multiple items, rewrite product descriptions, or refresh your inventory levels—doing it one by one is tedious. With a properly prepared CSV, you can update everything in bulk.
Adding New vs. Updating Existing Products
- New products are created when the handle in your CSV doesn’t already exist in your store.
- Existing products can be updated when your CSV includes the same handle that’s already tied to a product in Shopify. The handle acts as the unique identifier, so it must match exactly.
Using the “Replace Products with the Same Handle” Option
When uploading your CSV, Shopify gives you a checkbox: Replace any current products that have the same handle.
- If checked, Shopify will overwrite the existing product with the new data from your file.
- If left unchecked, Shopify will simply skip those products and only add new ones.
This is especially useful when you need to refresh product information in bulk, like updating descriptions or swapping out images.
Partial Updates vs. Full Updates
You don’t always need to update every single field:
- Partial updates work when you only want to change a few details, such as price or inventory. Just include the required columns plus the fields you’re updating.
- Full updates are better when you’re overhauling your catalog (for example, rewriting all descriptions or restructuring variants). This ensures consistency across your data.
A smart approach is to test updates with a small CSV file first. That way, you’ll see how Shopify applies changes before rolling them out storewide.
Alternatives and Tools Beyond Shopify’s Native CSV Import
Shopify’s built-in CSV import works well for most stores, but as your catalog grows, you might find yourself hitting limits. Large product ranges, complex data structures, or frequent updates can be tough to manage with spreadsheets alone. That’s when alternative tools and integrations can make a big difference.
Shopify Apps for Bulk Product Management
The Shopify App Store includes tools designed to simplify large-scale product updates. These apps often provide:
- More intuitive interfaces for editing product data
- Bulk editing capabilities without relying on CSV files
- Error-checking features to reduce import mistakes
For many merchants, these apps save time by cutting out the back-and-forth of editing spreadsheets, especially if imports are a regular part of your workflow.
When APIs or Third-Party Systems Make Sense
If you’re running a large or highly customized store, the CSV method might feel limiting. In these cases, connecting directly through Shopify’s API or using third-party integrations can be the smarter route. APIs allow you to:
- Automate product updates from an external system (like an ERP or inventory management tool)
- Sync data in real time rather than batch importing
- Handle thousands of SKUs without the formatting headaches that come with CSV files
For smaller stores, the native CSV feature is usually more than enough. But for bigger operations with constantly changing data, automation through APIs or dedicated apps can unlock speed and scalability that spreadsheets simply can’t match.
Final Thoughts
Managing products in Shopify doesn’t have to be a never-ending cycle of copy-and-paste. The CSV import feature turns what could be hours of manual work into a streamlined process that saves time and reduces mistakes. With a well-prepared file, you can launch a new catalog, refresh existing products, or scale your store without the stress of editing each item one by one.
The key is to treat your CSV file like the backbone of your store: keep it clean, test in small batches, and always back it up before making big changes. For many merchants, that’s all it takes to run a smooth operation. And if your store grows beyond what a spreadsheet can handle, Shopify’s ecosystem of apps and integrations is ready to take you further.
In the end, mastering CSV imports isn’t just about data—it’s about giving yourself more freedom to focus on what actually grows your business: your products, your customers, and your brand.
![]()