Your checkout page is where revenue is either made or permanently lost. This guide covers every customization method available — from a five-minute branding update on any Shopify plan to full Checkout UI Extensions and Shopify Functions on Plus — so you can find exactly what fits your store, your tech level, and your budget, and act on it today.
Most content about Shopify checkout customization makes the same mistake: it either talks exclusively about Shopify Plus features that 80% of store owners cannot access, or it narrows straight into a tutorial for one specific app without first explaining whether that app even suits your situation. The result is a reader who finishes an article knowing more about a product they cannot use, and still no clearer on what to actually do with their own store.
This guide is structured differently. It starts with where you are — your plan, your technical comfort level, your budget — and tells you exactly what is available to you right now. It then walks through every layer of checkout customization, from the free native branding controls that work on every plan, through the app ecosystem that opens up mid-tier options for all merchants, to the full extensibility stack available on Shopify Plus.
Whether you are a DTC founder running a $500k-a-year store on a standard Shopify plan, a growth lead at a $3M ARR brand looking to squeeze a meaningful CVR lift from checkout optimization, or a developer at a Shopify Plus merchant building custom checkout flows with UI Extensions and Functions — this guide has a section that addresses your situation directly.
The goal is a 20–40% conversion rate improvement on checkout. That number is achievable. The path to it depends on where you start.
What Checkout Customization Is Actually Available on Your Plan
Before diving into any specific technique, it is worth spending two minutes on a reality check. Shopify’s checkout customization capabilities are not equal across plans — and the gap between Basic/Advanced and Shopify Plus is significant. Here is the complete picture:
| Feature | Basic / Starter | Advanced | Shopify Plus |
| Branding & colors | ✓ Full control | ✓ Full control | ✓ Full control |
| Logo & font customization | ✓ | ✓ | ✓ |
| Custom checkout fields | ✗ Not available | ✗ Not available | ✓ UI Extensions |
| Checkout upsells (native) | ✗ | ✗ | ✓ Extensions |
| Shopify Functions | ✗ | ✗ | ✓ |
| Third-party upsell apps | ✓ (Zipify, ReConvert) | ✓ | ✓ (all tools) |
| One-click checkout / Shop Pay | ✓ | ✓ | ✓ |
| BNPL (Klarna, Afterpay) | ✓ (payment settings) | ✓ | ✓ + custom placement |
| Headless checkout (API) | ✗ | ✗ | ✓ Storefront API |
| A/B testing native | ✗ | ✗ | ✓ |
| Multi-currency checkout | ✓ (Markets) | ✓ (Markets) | ✓ + localization |
The practical implication: if you are on Basic or Advanced Shopify, your customization toolkit is native branding controls plus third-party apps. That is still a meaningful set of options — many stores have driven 10–15% CVR improvements without ever touching Checkout UI Extensions. But if your store is approaching the Shopify Plus threshold ($500k+ ARR or complex B2B requirements), this table makes a compelling case for the upgrade.
Read more: Top 6 Checkout Apps Review
Native Checkout Customization (All Plans, 5–30 Minutes)
Every Shopify store — regardless of plan — has access to a set of native checkout customization controls that are more powerful than most merchants realize. These are the first things you should configure before investing a dollar in apps or development, because they directly affect dynamic checkout branding, mobile checkout optimization, and guest checkout acceleration — three factors that influence conversion rate independently of any upsell strategy.
1.1 Checkout Branding: Colors, Typography, and Layout
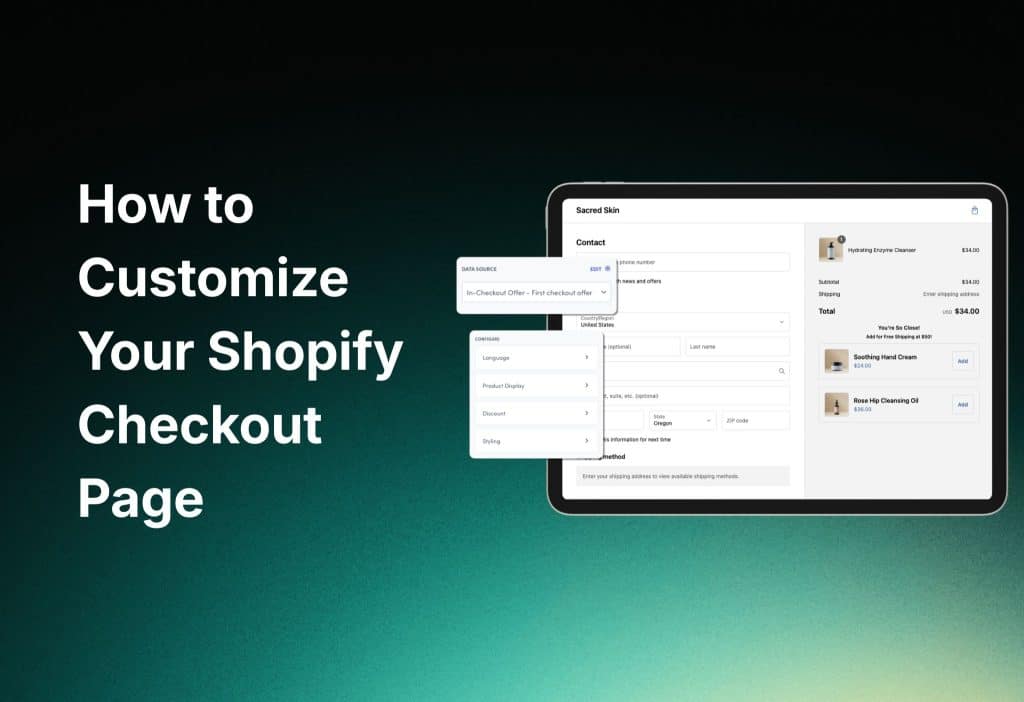
In your Shopify admin, navigate to Settings → Checkout → Customize. The Checkout Editor opens a visual interface where you can control background colors, accent colors, button styles, font choices, and logo placement. These are not cosmetic decisions — they are trust signals. A checkout page that visually matches your storefront reduces the cognitive friction that causes customers to hesitate at the payment step.
The typography settings deserve particular attention for checkout UI/UX design. Shopify’s native checkout supports a defined set of system fonts and Google Fonts. Choose fonts that match your brand’s visual identity, and ensure the weight and size settings produce readable labels and input fields at mobile screen sizes. A headline font that looks elegant on desktop becomes a usability problem on a 375px screen if the weight is too light.
For checkout page speed optimization, Shopify’s native checkout is already highly optimized at the infrastructure level — it runs on Shopify’s own CDN and is not affected by theme bloat. Where merchants introduce speed problems is by installing too many third-party checkout apps simultaneously. Each additional app block adds JavaScript execution time. The general rule: install one or two well-chosen apps, not five competing ones, and audit Core Web Vitals on the checkout after each installation.
1.2 Payment Methods: BNPL, Express Checkout, and Multi-Gateway
The payment methods section of your checkout is one of the highest-leverage areas of frictionless checkout flow optimization that any merchant can access without code or apps. The configuration is in Settings → Payments, and the decisions you make here directly affect whether customers reach the confirmation page or abandon.
Buy Now Pay Later options — Klarna, Afterpay, Shop Pay Installments — have become a standard expectation for a significant segment of online shoppers, particularly in the 25–40 age group. BNPL checkout integration is available on all Shopify plans through the payments settings. Enabling it typically requires only activating the relevant payment provider; no code changes are needed. The average order value impact varies by product category but is most pronounced for purchases above $100, where installment framing reduces the perceived commitment of the transaction.
Express checkout options — Apple Pay, Google Pay, Shop Pay — should be enabled for every store without exception. These accelerated payment methods allow returning customers to complete a purchase in seconds, bypassing the need to re-enter shipping and payment details. One-click checkout on Shopify is primarily delivered through Shop Pay, which maintains customer credentials across all Shopify stores. The conversion lift for returning customers who use Shop Pay is documented at 18% above the baseline checkout completion rate.
For merchants selling across multiple markets, multi-payment gateway checkout configuration matters more than it might appear. Customers in different regions have strong preferences for local payment methods — iDEAL in the Netherlands, Sofort in Germany, PayNow in Singapore. Shopify Markets (available on all plans) handles localized checkout currency and region-specific payment method visibility. Review your top traffic countries in Analytics and ensure the preferred local payment method for each is enabled.
1.3 Guest Checkout and Account Friction
Cart abandonment at the checkout step is most commonly caused not by shipping costs or payment concerns, but by account creation requirements. Research consistently shows that forced account registration is the single most frequently cited reason for checkout abandonment among first-time buyers.
In Settings → Checkout → Customer accounts, set the account option to ‘Accounts are optional.’ This enables guest checkout acceleration — customers can complete their purchase without registering, and the system optionally prompts them to create an account on the post-purchase confirmation page, where the transaction is already complete and the friction cost of declining is zero.
For cart abandonment recovery, Shopify’s built-in abandoned checkout emails (Settings → Notifications) provide a baseline recovery mechanism that requires no additional tools. Configure the timing — one hour after abandonment is the standard recommendation — and personalize the subject line. For higher-volume stores, dedicated cart abandonment tools like Klaviyo or Omnisend provide significantly more sophisticated segmentation and sequencing, but the native emails represent a meaningful recovery mechanism that takes five minutes to activate.
App-Powered Checkout Optimization (All Plans, 15–60 Minutes)
With native configuration handled, the next layer of checkout customization is the app ecosystem — tools that extend what Shopify’s native interface offers, available to all merchants regardless of plan. The category of most interest to growth-focused store owners is checkout upsells and post-purchase upsell checkout flows, because these directly address average order value without requiring any change to the core checkout experience that affects conversion rate.
The key distinction to understand is where in the checkout funnel each app type operates. Some apps inject offers into the checkout page itself — this requires Shopify Plus for the most native integration, though some tools offer pre-checkout or post-checkout placements that work on all plans. Others operate exclusively on the thank-you and order status pages, which are available for customization on all plans. Understanding this distinction prevents a common mistake: selecting an app, installing it, and then discovering that the placement you wanted requires an upgrade.
Read more: Checkout Links Review: The Secret Weapon for Shopify Merchants
2.1 The App Comparison: Which Tool for Which Store
Here is a direct comparison of the main checkout optimization tools, evaluated on the criteria that matter to DTC founders and growth teams:
| Tool / App | Shopify Plan | Pricing | AOV Lift | Setup Time | Best For |
| Native Shopify (Branding API) | All plans | Free | +5–10% | 5–30 min | Basic branding & fonts |
| Checkout UI Extensions | Plus only | Free (dev) | +5–15% | 2–5 hrs | Custom fields, upsells |
| Shopify Functions | Plus only | Free (dev) | +10–20% | 4–8 hrs | Discount logic, shipping |
| Rebuy Engine | Plus only | $99–$749/mo | +11–25% | 15–30 min | AI upsells & cross-sells |
| Zipify OneClickUpsell | All plans | $67–$149/mo | +8–15% | 20–30 min | Post-purchase funnels |
| ReConvert | All plans | $29–$99/mo | +15% | 15 min | Thank you page upsells |
| GemPages Checkout | All plans | $29–$99/mo | +7–12% | 30 min | Landing + checkout design |
Reading this table: If you are on Basic or Advanced Shopify and want upsell capability today, Zipify OneClickUpsell and ReConvert are your starting points — both operate on post-purchase placements that do not require Plus. If you are on Shopify Plus, Rebuy Engine’s AI-powered recommendations at the checkout step represent the highest AOV lift in the category, backed by documented case studies showing 11%+ AOV improvement. The native Extensions approach (free but developer-dependent) is the right path if you have in-house Shopify development capability and want zero ongoing app cost.
2.2 Post-Purchase Upsell Flow: The Overlooked Conversion Lever
The post-purchase upsell checkout placement — the page that appears immediately after a customer clicks ‘Complete order’ but before the final order confirmation — is the highest-converting upsell position in ecommerce. The customer has just made a buying decision. Their purchase anxiety is resolved. They are in a positive emotional state, and their payment details are already entered. Adding a complementary product to the same order requires only one click — no re-entering card information.
This placement is available on all Shopify plans, and it represents the fastest path to a meaningful AOV improvement for merchants who are not on Shopify Plus. Zipify and ReConvert both support this placement with one-click add-to-order functionality. The offer logic should be simple and directly complementary to what the customer just purchased — accessories, consumables, extended warranties, or bundles that make the primary purchase more useful.
2.3 Checkout A/B Testing: Making Decisions With Data
Any meaningful investment in checkout optimization should be accompanied by checkout A/B testing tools to measure whether changes are actually improving conversion. This is where most merchants underinvest: they implement a change, observe a rough before/after comparison, and declare success or failure without the statistical confidence to know whether the outcome was causal or coincidental.
On Shopify Plus, the platform provides native A/B testing capability for checkout through the checkout profiles feature. Rebuy also includes A/B testing for its checkout widgets. For merchants on other plans, Google Optimize (now deprecated) has been replaced by a combination of Shopify’s own analytics segmentation and third-party tools like Convert.com or VWO, which can track checkout page behavior even without native Shopify integration.
The metrics to track are conversion rate at each checkout step (address entry, payment entry, order confirmation), average order value, and cart abandonment rate by step. A 5% improvement in checkout-to-confirmation conversion rate on a store doing 200 orders per month is 10 additional orders — at average order values of $80–$150, that is $800–$1,500 in monthly revenue from a configuration change that took 30 minutes to implement.
Shopify Plus Checkout Extensibility (Developer Required, 2–8 Hours)
Shopify Plus merchants have access to a checkout customization stack that no other plan can touch. Checkout extensibility — the umbrella term for Checkout UI Extensions, Shopify Functions, and the Checkout Branding API — was introduced as Shopify’s answer to the previous era of checkout.liquid hacking. It provides a structured, upgrade-safe way to extend the checkout with custom UI components, logic modifications, and programmatic discount and shipping rules.
This tier requires developer involvement. That does not mean you need a six-month engagement — a competent Shopify developer can implement a well-specified Checkout UI Extension in two to five hours, and a custom Shopify Function in four to eight hours depending on complexity. But it does mean that the instructions below are written for someone who either has that technical resource available or is willing to hire one.
3.1 Checkout UI Extensions: Custom Fields and Native Upsell Blocks
Checkout UI Extensions allow you to inject custom React components — rendered natively within Shopify’s checkout interface — at a set of defined extension points: above and below the order summary, above the shipping methods, above and below the payment methods, and on the thank-you and order status pages.
The most commercially valuable use cases are custom checkout fields — gift message inputs, delivery date pickers, subscription preference selectors, B2B purchase order number fields — and native checkout upsell blocks that display product recommendations within the checkout layout without requiring a third-party app. For B2B and wholesale merchants, custom fields enable the collection of the company name, account number, or VAT ID that makes commercial invoicing possible.
The development workflow: create the extension with Shopify CLI, implement the React component using Shopify’s Checkout UI component library, deploy to your store, and add the extension block through the Checkout Editor — the same visual interface used for native customization. No manual theme code edits required, and the extension survives Shopify checkout upgrades without breaking.
For checkout UI/UX design at the Plus level, the Branding API extends the visual customization available in the native editor: custom fonts from any source (not just Shopify’s library), fine-grained control over spacing and border-radius, and the ability to apply conditional styling based on cart contents or customer attributes. This is the right tool for brands with strict design systems that need the checkout to feel genuinely custom rather than ‘Shopify-branded with colors changed.’
3.2 Shopify Functions: Custom Discount and Shipping Logic
Shopify Functions are server-side WebAssembly programs that run within Shopify’s infrastructure and override the default logic for discounts, shipping methods, payment method filtering, and cart transformations. They are the mechanism behind some of the most powerful checkout customization use cases available on Plus: volume-tiered pricing that auto-applies at checkout, B2B customer-specific discount rules, shipping method restrictions based on cart weight or destination, and payment method visibility rules based on order value or customer tags.
A practical example: a merchant wants to hide the ‘Cash on Delivery’ payment option for orders above $500, and show a BNPL option only when the cart total is between $100 and $2,000. Both of these are payment method filter Functions — straightforward to implement, impossible without Functions on Plus, and directly relevant to multi-payment gateway checkout optimization.
For conversion rate checkout CRO, the highest-value Function implementations are typically in the discount logic category. Automatically applying the best available discount for each customer — based on their tag, their order history, or their cart composition — removes the friction of coupon code entry that causes a measurable percentage of customers to abandon checkout to search for a code they may or may not find.
3.3 Headless Checkout Customization
For Shopify Plus merchants running a headless commerce architecture — a custom frontend built on Next.js, Nuxt, or Remix, connected to Shopify’s Storefront API — headless checkout customization follows a different path. The storefront experience is entirely custom; the checkout itself still uses Shopify’s hosted checkout, which means Checkout UI Extensions and Functions apply in exactly the same way as for non-headless Plus stores.
The primary headless consideration is the cart-to-checkout transition. In a headless build, the cart is managed by your frontend — either via the Cart API or through Shopify’s Storefront API — and checkout is initiated by generating a checkout URL and redirecting the customer to Shopify’s hosted checkout domain. The frictionless checkout flow challenge in headless is ensuring this transition is fast and visually seamless: the customer should not experience a jarring context switch between your custom frontend and the Shopify checkout.
Practical optimization: preload the checkout URL in the background as soon as a customer adds their first item to cart, so that the transition happens in under 300ms. Pass customer pre-population data (email, shipping address for logged-in customers) via checkout URL parameters to eliminate re-entry. And match the checkout branding as closely as possible to your custom frontend through the Branding API, so the handoff is visually continuous.
Turning Checkout Optimization Into a Measurable CVR Lift
Checkout customization without measurement is decoration. The goal is a 20–40% conversion rate improvement — a range that is achievable, but only if changes are implemented systematically and evaluated against baseline data.
Start by establishing your current checkout funnel metrics. In Shopify Analytics, the Checkout Funnel report shows the percentage of sessions that progress from cart to checkout initiation, from checkout initiation to payment entry, and from payment entry to order confirmation. The step with the steepest drop is your highest-priority optimization target.
For most stores, the steepest drop is at the checkout-initiation-to-payment-entry step — the point where customers are presented with the address form and payment options. Guest checkout acceleration, express checkout options, and ensuring the mobile checkout experience is fast and ergonomic are the three changes most likely to move this metric. On mobile, the checkout form should load in under two seconds, input fields should be appropriately sized for thumb input, and Apple Pay or Google Pay should be prominently visible above the standard form — not buried below it.
For mobile checkout optimization specifically, run a quarterly audit on a real device (not just Chrome’s mobile emulator) covering form input usability, button tap targets, font readability, and payment method visibility. Mobile conversions are systematically lower than desktop for most Shopify stores, and the gap is rarely because the product or pricing is wrong — it is almost always a UX issue that becomes invisible when reviewing analytics on a desktop screen.
Frequently Asked Questions
Can I customize the Shopify checkout on a Basic plan?
Yes, but with limitations. On Basic and Advanced plans, you can customize branding (colors, fonts, logo), configure payment methods including BNPL and express checkout options, and use third-party apps for post-purchase upsells. You cannot use Checkout UI Extensions or Shopify Functions — those require Shopify Plus. The app-based approach (Zipify, ReConvert) is the practical workaround for AOV optimization on non-Plus plans.
How much does Shopify checkout customization typically cost?
For Basic/Advanced plans: native customization is free; app costs range from $29–$149/month depending on volume and tool. For Shopify Plus: native customization and Extensions are free but require developer time ($500–$3,000 for a typical Extension implementation); complex Functions development runs $1,000–$5,000 depending on logic complexity. Total investment for a meaningful checkout optimization program across all layers: $500–$10,000, with the mid-range being well-justified by the revenue impact of even a 5% CVR improvement.
What is the fastest change I can make today to improve checkout conversion?
Enable guest checkout (Settings → Checkout → Accounts are optional), activate all available express checkout methods (Apple Pay, Google Pay, Shop Pay), and enable at least one BNPL option (Afterpay, Klarna, or Shop Pay Installments). Combined, these three changes take under 30 minutes and address the most common conversion blockers — forced account creation, re-entry of payment details, and upfront payment barrier for higher-value orders.
Do I need a developer to use Checkout UI Extensions?
Yes. Checkout UI Extensions require React development knowledge and familiarity with Shopify CLI. A competent Shopify developer can implement a standard extension in two to five hours. If you do not have in-house development capability, consider using Rebuy or Zipify (depending on your plan) as the no-code path to checkout upsells, and save the Extensions investment for custom field requirements that apps cannot meet.
How do I recover abandoned checkouts without third-party apps?
Shopify’s built-in abandoned checkout emails are in Settings → Notifications → Abandoned checkout. Activate them, set the send delay to 1 hour, and personalize the subject line to include the customer’s first name if available. For stores on any paid plan, this single configuration recovers a meaningful percentage of abandoned carts with zero additional cost. For higher-volume recovery, Klaviyo or Omnisend provide significantly more sophisticated sequencing, but the native emails are the baseline that every store should have active.
Where to Go From Here
Checkout optimization is not a one-time project — it is an ongoing practice. The stores consistently achieving the highest conversion rates on Shopify are not the ones who ran one optimization sprint two years ago; they are the ones who have a quarterly checkout audit process, a habit of reviewing step-level funnel data, and a systematic approach to testing changes before declaring them permanent.
Recommended starting actions by plan:
Basic / Advanced: Enable guest checkout + Shop Pay + one BNPL option → install ReConvert for post-purchase upsell.
Shopify Plus (no dev resource): Implement Rebuy checkout extensions for AI upsells + configure A/B testing.
Shopify Plus (with dev resource): Build one Checkout UI Extension for your highest-value custom field + implement a discount Function to eliminate coupon entry friction.